A light pollution map NZ is a crucial navigational tool for photographers and stargazers, visualizing the intensity of artificial skyglow across New Zealand. By utilizing these maps to locate zones with low luminance—specifically Bortle Class 1 or 2 areas—travelers can identify the optimal locations to capture high-contrast, noise-free images of the Milky Way and Aurora Australis.
Introduction to Dark Skies in Aotearoa
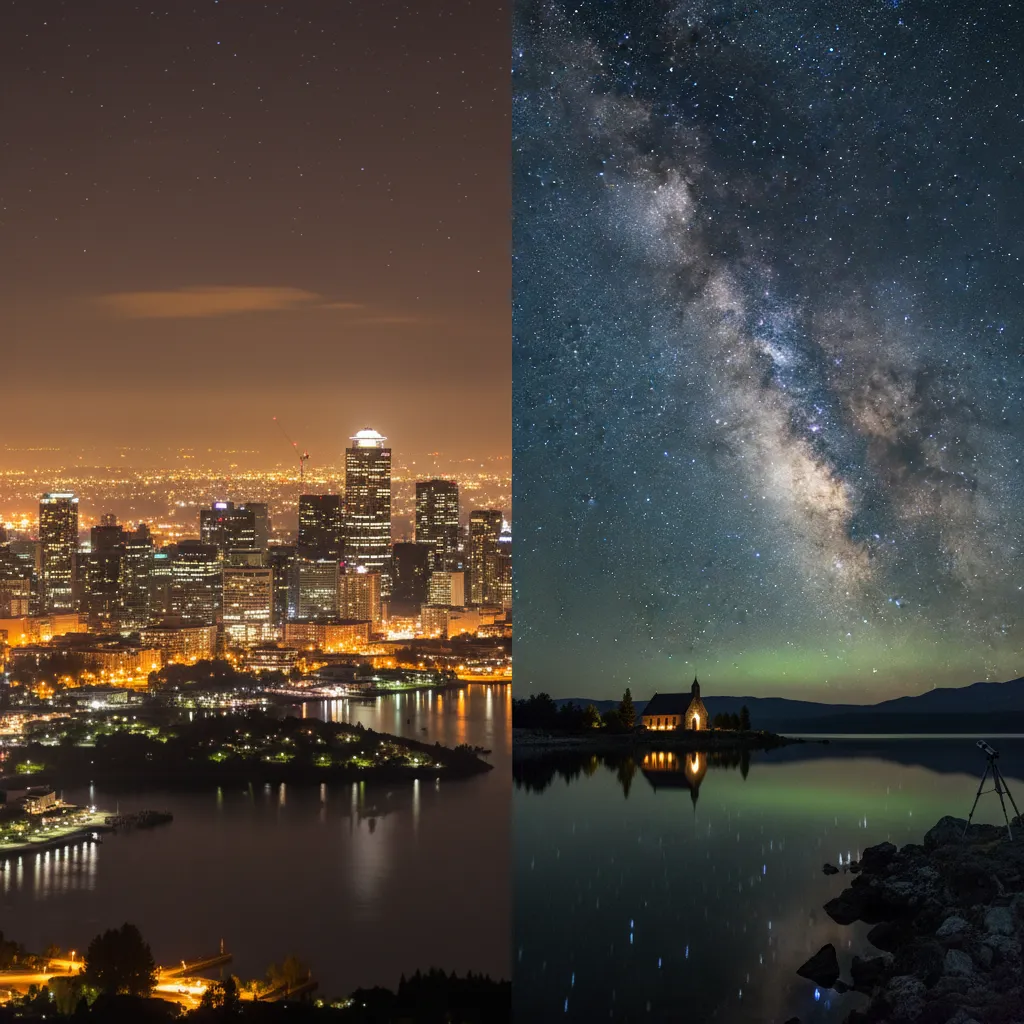
New Zealand is globally renowned as a premier destination for eco-tourism and independent travel, largely due to its pristine landscapes and relatively low population density. However, for the traveling photographer or the campervan enthusiast chasing the Southern Lights (Aurora Australis), simply driving out of town is often not enough. Artificial light—streetlights, industrial glow, and residential sprawl—creates a dome of “skyglow” that washes out faint stars and reduces the contrast necessary for breathtaking astrophotography.
To truly capture the core of the Milky Way or the elusive magenta hues of the Aurora, one must understand how light propagates through the atmosphere. This is where a light pollution map NZ becomes the most valuable item in your digital toolkit. Unlike standard topographic maps, these overlays reveal the invisible barriers to clear photography, guiding you toward the coveted International Dark Sky Sanctuaries that Aotearoa is famous for.
The Bortle Scale Explained: Measuring Darkness
Before interpreting a map, you must understand the metric used to measure sky quality: the Bortle Dark-Sky Scale. Created by John E. Bortle in 2001, this nine-level numeric scale quantifies the astronomical observability of celestial objects and the interference caused by light pollution.
Bortle Class 1: Excellent Dark-Sky Site
This is the “Holy Grail” for photographers. In New Zealand, Class 1 skies are found in remote areas like Stewart Island/Rakiura or deep within the Southern Alps. Here, the Milky Way casts a visible shadow on the ground, and the zodiacal light is striking. Photographic noise is minimal, allowing for high ISO usage without the background turning muddy orange.
Bortle Class 2: Typical Truly Dark Site
Most of New Zealand’s dedicated Dark Sky Reserves, such as the Aoraki Mackenzie International Dark Sky Reserve, fall into this category. The surroundings are dark, but you might see a faint glow on the horizon from a distant town. This is still exceptional for professional-grade astrophotography.
Bortle Class 3 to 4: Rural Sky to Rural/Suburban Transition
These are the transition zones. A Class 3 sky (Rural) allows for complex Milky Way structure to be visible, but clouds may be illuminated by ground light. Class 4 begins to show significant light domes from population centers. For a traveler in a campervan, Class 3 is often the easiest accessible “good” sky without hiking into the wilderness.
Bortle Class 5 to 9: Suburban to Inner-City Sky
From Class 5 upwards, the Milky Way becomes washed out or invisible. Class 8 and 9 represent inner-city Auckland or Wellington, where only the brightest stars and planets are visible. Astrophotography in these zones requires specialized narrowband filters to cut through the sodium and LED wavelengths.
How to Use a Light Pollution Map NZ Effectively
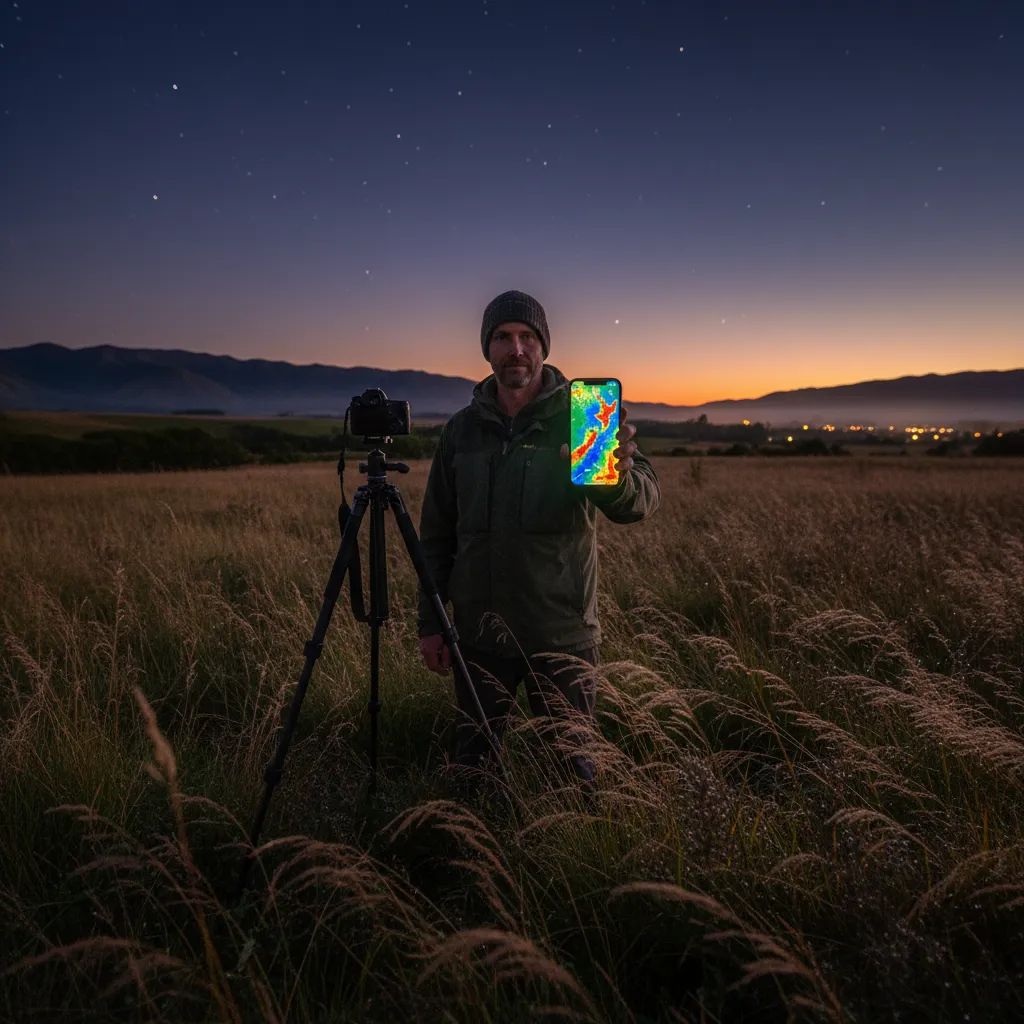
Successfully planning a night shoot involves more than just glancing at a map; it requires interpreting the data layers correctly. When accessing a digital light pollution map NZ, you are typically looking at data derived from satellite sensors like the VIIRS (Visible Infrared Imaging Radiometer Suite).
Interpreting the Color Gradients
Most maps use a heat-map overlay system:
- White/Red/Orange: These areas represent high radiance. Avoid these zones for wide-angle astrophotography. They are suitable only for planetary or lunar photography.
- Yellow/Green: These are transition zones (Bortle 4-5). You can photograph the stars here, but you will likely need to use “Expose to the Right” (ETTR) techniques and perform significant post-processing to remove gradients.
- Blue/Grey/Black: These are your targets. Blue represents Bortle 3, while Grey and Black indicate Bortle 1 and 2. In New Zealand, the grey zones cover vast swathes of the South Island and the central North Island.
Navigating Topography and Light Domes
A 2D map has limitations—it does not show terrain. A crucial tip for NZ eco-tourists is to use the terrain to your advantage. If you are stuck near a yellow zone (a small town), position yourself so that a mountain range lies between you and the light source. The physical barrier of the Southern Alps, for example, blocks the light dome from Christchurch, preserving the darkness of the West Coast.
The Impact of Moon Phases on Night Photography
Even if you find a location on your light pollution map NZ that is perfectly black (Bortle 1), nature provides its own source of light pollution: the Moon. Understanding the lunar cycle is just as important as avoiding city lights.
The “New Moon” Window
The ideal time for astrophotography is during the New Moon phase, or the 3-4 days immediately surrounding it. During this time, the moon is not visible in the night sky, providing the maximum contrast for the Galactic Core. For travelers planning a trip to New Zealand specifically for stargazing, aligning your itinerary with the lunar calendar is essential.
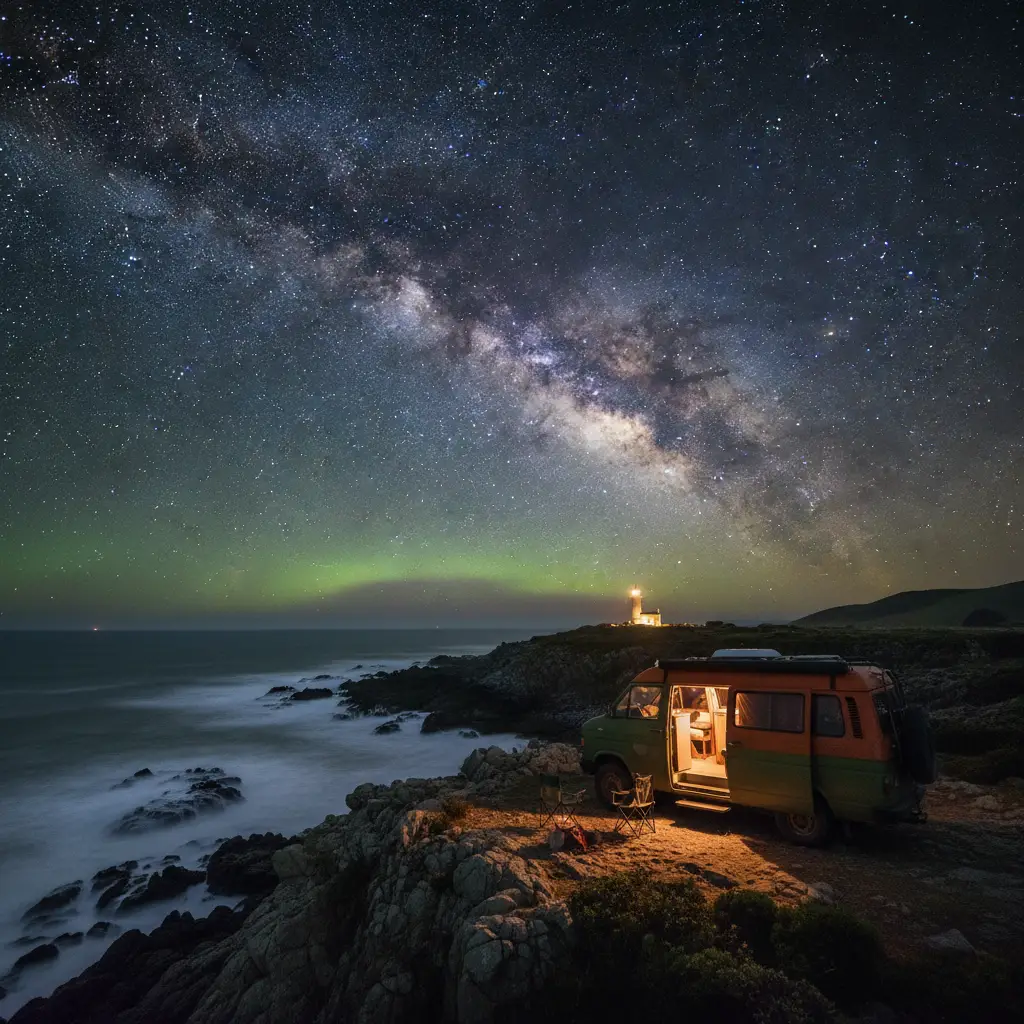
Shooting During Moonlight
If your trip coincides with a Full Moon or Gibbouus Moon, all is not lost. The moon acts as a giant softbox, illuminating the landscape. While you may lose the faint details of the nebulae, you can capture stunning “moonscapes” where the foreground (mountains, tussock grasses, glaciers) is lit up, and the brighter stars are still visible. This style of photography is distinct but equally beautiful. However, to see the Aurora Australis, moonlight is generally detrimental as it washes out the color of the beams.
Hidden Dark Spots Near Cities
Many independent travelers start their journey in major hubs. You don’t always have to drive five hours to find dark skies. Here are accessible locations identified via light pollution maps near major centers.
Near Auckland: The Waitakere Ranges & Great Barrier Island
Auckland emits a massive light dome (Bortle 8/9). However, by driving west to the Waitakere Ranges, specifically beaches like Piha or Bethells, you can turn your back on the city. Facing west over the Tasman Sea, the skies drop to a Bortle 4. For a true dark sky experience, a ferry to Great Barrier Island (Aotea) places you in an International Dark Sky Sanctuary (Bortle 1) just a short trip from the metropolis.
Near Wellington: The Wairarapa Coast
Wellington’s topography helps contain its light. By driving over the Remutaka Hill to the Wairarapa, particularly towards Cape Palliser, you enter Bortle 2 territory quickly. The lighthouse at Cape Palliser provides a stunning foreground subject against the Milky Way, facing south toward the celestial pole.
Near Christchurch: Banks Peninsula
While the Canterbury Plains suffer from light spread, the Banks Peninsula offers many hidden bays. Bays on the eastern and southern sides of the peninsula, such as Le Bons Bay or Akaroa (away from the township lights), offer Bortle 3 skies. The hills block the glow from Christchurch effectively.
Camera Settings for Different Pollution Levels
Your camera settings must adapt to the pollution levels indicated on your map. Light pollution introduces a “signal-to-noise” problem. In high light pollution, the background sky is bright, limiting how long you can expose the image before it turns white.
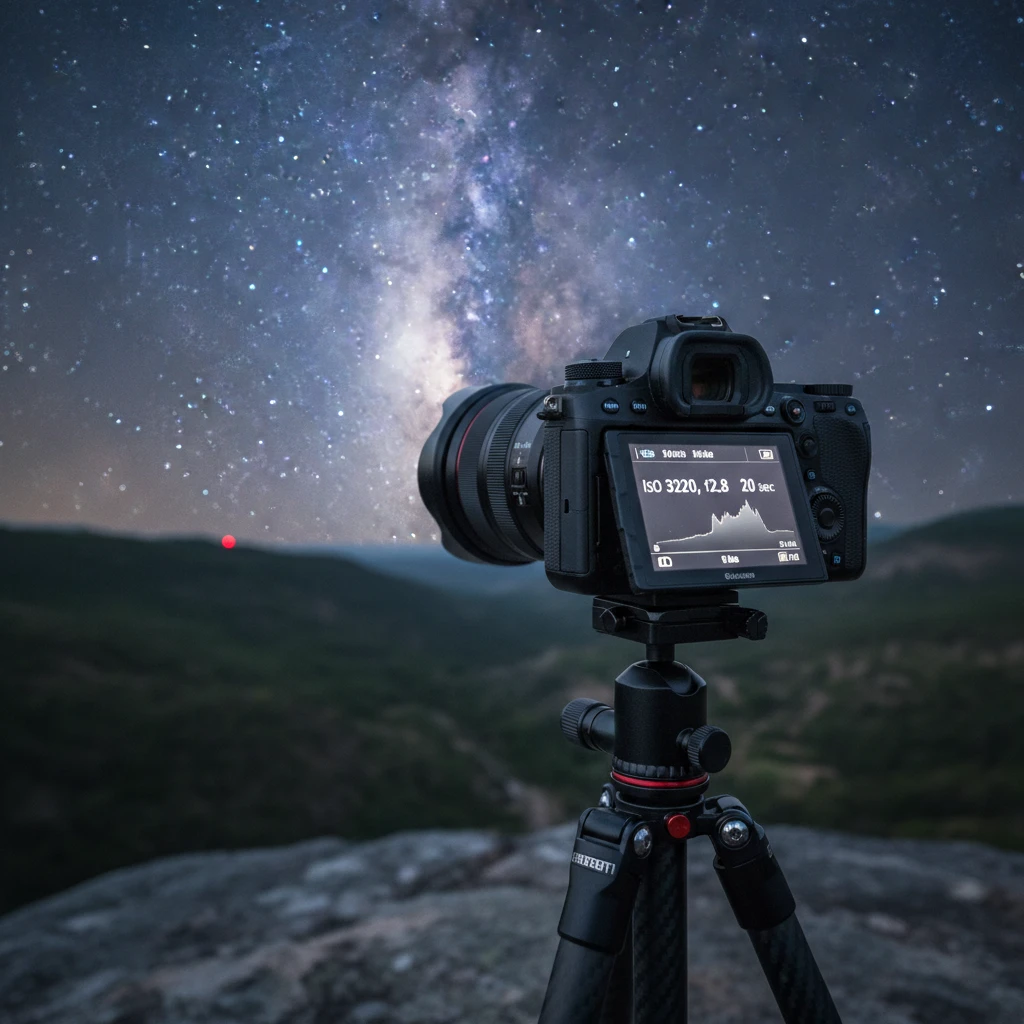
Settings for Dark Sky Reserves (Bortle 1-2)
In pristine NZ environments like Lake Tekapo or Stewart Island, you can push your gear to the limit to capture faint detail.
- ISO: 3200 to 6400.
- Aperture: f/2.8 or wider (f/1.4 is ideal).
- Shutter Speed: 20-30 seconds (depending on focal length, use the 500 rule).
- Result: Incredible detail, airglow colors, and clearly defined dust lanes in the Milky Way.
Settings for Suburban Skies (Bortle 4-6)
Here, you are battling the orange/yellow glow. You must reduce the amount of light hitting the sensor to prevent overexposing the background.
- ISO: 800 to 1600.
- Aperture: f/2.8 to f/4.
- Shutter Speed: 10-15 seconds.
- Technique: It is highly recommended to take multiple shorter exposures and “stack” them using software like Sequator or Starry Landscape Stacker. This averages out the noise and helps separate the stars from the light pollution glow.
People Also Ask
Where are the dark sky reserves in NZ?
New Zealand is home to several key dark sky areas. The most famous is the Aoraki Mackenzie International Dark Sky Reserve in the South Island. Others include the Great Barrier Island (Aotea) Dark Sky Sanctuary, the Stewart Island/Rakiura Dark Sky Sanctuary, and the Wai-iti Dark Sky Park in Nelson. These locations are legally protected to conserve the night sky.
What is the best month for Milky Way photography in NZ?
The galactic core of the Milky Way is most visible in New Zealand’s winter months. The best viewing season runs from February to October. Mid-winter (June and July) offers the longest nights, allowing for the core to be visible for many hours, spanning from the southeast to the southwest sky.
Can you see auroras in New Zealand?
Yes, the Aurora Australis (Southern Lights) is visible in New Zealand, particularly in the lower South Island. Locations like Invercargill, The Catlins, Lake Tekapo, and Stewart Island offer the best chances. Unlike the Milky Way, Auroras are solar-dependent, so checking space weather forecasts (Kp index) is essential.
Is New Zealand good for stargazing?
New Zealand is widely considered one of the best countries in the world for stargazing. Its isolation in the South Pacific, low population density, and strict lighting ordinances in specific districts result in exceptionally dark skies. It is one of the few places where the Magellanic Clouds are easily visible to the naked eye.
What Bortle class is Lake Tekapo?
Lake Tekapo is situated within the Aoraki Mackenzie International Dark Sky Reserve and generally boasts Bortle Class 1 to Class 2 skies. The village itself has strict lighting controls (shielded, sodium-free lights) to ensure that the sky quality remains pristine for the nearby Mt John Observatory.
How does light pollution affect photos?
Light pollution reduces the contrast between the stars and the background sky. In a photo, this manifests as an orange or washed-out grey haze that obscures faint details like nebulae and the Milky Way’s dust lanes. It also introduces color gradients that can be difficult to correct in post-processing.