The Aurora Australis forecast in New Zealand relies on monitoring solar wind data, specifically the Kp index and the Interplanetary Magnetic Field (Bz). For optimal visibility, a Kp index of 5 or higher combined with a negative Bz value is required, with the best viewing opportunities occurring in the lower South Island during the dark winter months of June through August.
For astrophotographers and eco-tourists alike, the hunt for the Southern Lights is a pursuit of patience, science, and serendipity. Unlike their northern counterpart, the Aurora Borealis, the Southern Lights are elusive, often requiring specific atmospheric conditions and a clear view of the southern horizon. New Zealand, home to some of the darkest skies on the planet, offers a front-row seat to this celestial theater.
Understanding the Science: Kp Index and Solar Activity
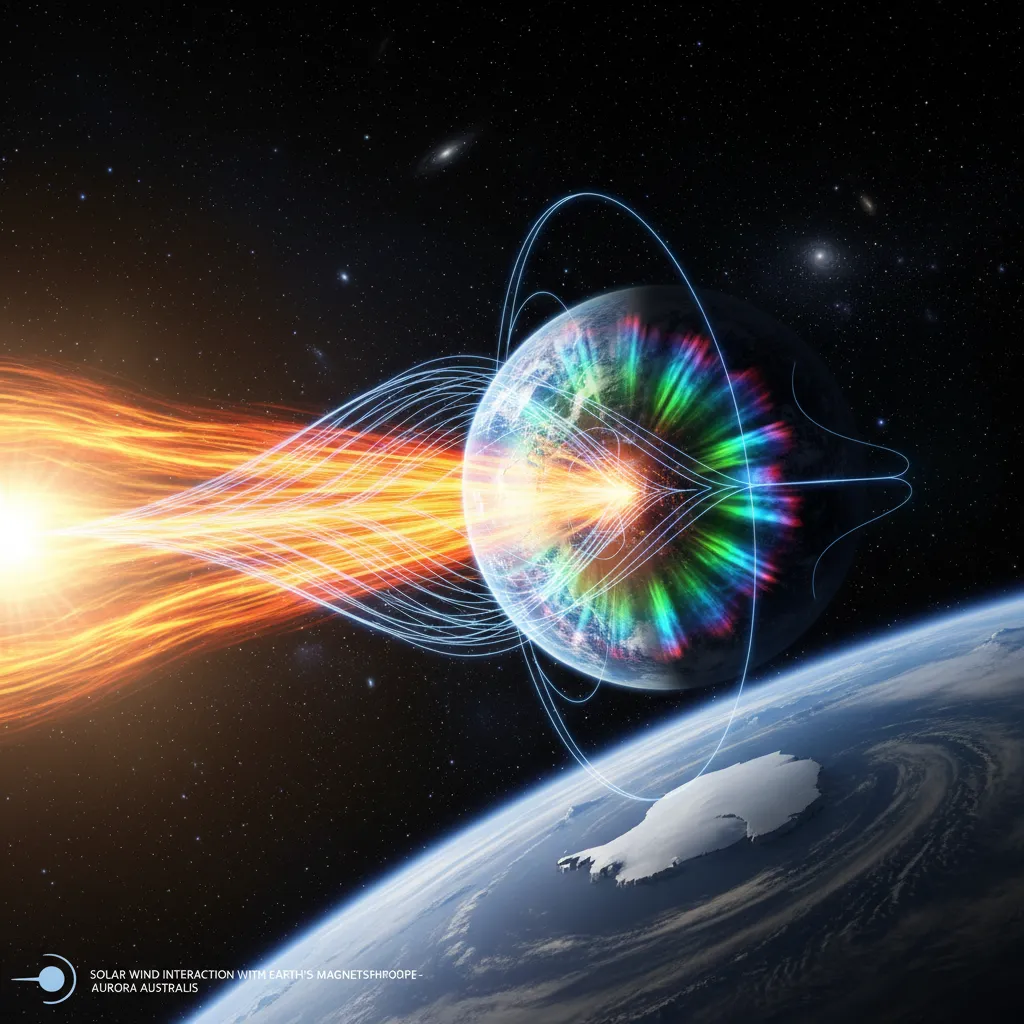
To successfully interpret an aurora australis forecast in New Zealand, one must first understand the mechanism driving the phenomenon. The lights are caused by charged particles from the sun interacting with Earth’s magnetic field. However, simply knowing a solar storm is active is not enough; you must understand the metrics that determine visibility.
What is the Kp Index?
The K-index quantifies disturbances in the horizontal component of earth’s magnetic field with an integer in the range 0-9 with 1 being calm and 5 or more indicating a geomagnetic storm. The planetary K-index, or Kp, is derived from the mean K-indices.
- Kp 0-2: Low activity. Aurora is usually only visible from Antarctica.
- Kp 3-4: Moderate activity. Photographic aurora may be visible on the horizon in Stewart Island and the Catlins.
- Kp 5 (G1 Storm): Minor Storm. Visible to the naked eye in the lower South Island; photographic potential reaches as far north as Christchurch.
- Kp 6-7 (G2-G3 Storm): Strong Storm. Spectacular beams and pillars visible across the South Island and potentially the lower North Island.
- Kp 8-9 (G4-G5 Storm): Extreme Storm. Rare events where the aurora can be seen as far north as Auckland or Northland.
The Critical Factor: The Bz Component
Many amateur chasers rely solely on the Kp index and are disappointed when a Kp 5 night yields nothing. The missing variable is usually the Bz component of the Interplanetary Magnetic Field (IMF). The Bz indicates the direction of the solar wind’s magnetic field.
For the Aurora Australis to occur, the Bz must be negative (Southward). Think of the Earth’s magnetic field as a shield. When the solar wind’s magnetic field is pointing North (positive Bz), it bounces off our shield. When it points South (negative Bz), it connects with Earth’s magnetic field lines, pouring energy into the atmosphere and creating the light show. A Kp of 6 with a positive Bz will result in dark skies, whereas a Kp of 4 with a strongly negative Bz can produce a stunning display.
Best Seasons: Why Winter (June-Aug) is Superior
While solar activity happens year-round, the aurora australis forecast New Zealand observers rely on is heavily dictated by darkness. Unlike the Aurora Borealis, which has a defined “season” due to the extreme latitudes of the northern hemisphere, the Southern Lights are technically present anytime solar activity spikes. However, visibility is strictly limited by the hours of darkness.
The Darkness Advantage
New Zealand’s winter months—June, July, and August—offer the longest nights. In the deep south, darkness can last from 5:30 PM to 8:00 AM, providing a massive window of opportunity. Conversely, in summer (December-January), the sky in southern latitudes often retains a twilight glow until very late, and true astronomical darkness is short-lived, washing out faint auroras.
The Equinox Effect
Scientific studies, specifically regarding the Russell-McPherron effect, suggest that geomagnetic activity is statistically higher around the equinoxes (March and September). During these periods, the misalignment between the Earth’s magnetic poles and the solar wind creates cracks in the magnetosphere, allowing more solar wind to enter.
Therefore, late March and late September are often considered “sweet spots” where reasonable darkness balances with statistically higher probabilities of solar storms. However, for the absolute darkest skies and clearest air, winter remains the champion for serious photographers.
Top Locations: The Catlins, Lake Tekapo, and Hoopers Inlet
Location is paramount. To see the lights, you need three things: a low latitude (further south), low light pollution, and an unobstructed view of the southern horizon.
1. The Catlins (Nugget Point)
Located at the southeastern corner of the South Island, The Catlins offers some of the darkest skies in the country. Nugget Point Lighthouse is an iconic foreground for astrophotographers. The view south is completely uninterrupted by land or city lights, stretching straight toward Antarctica.
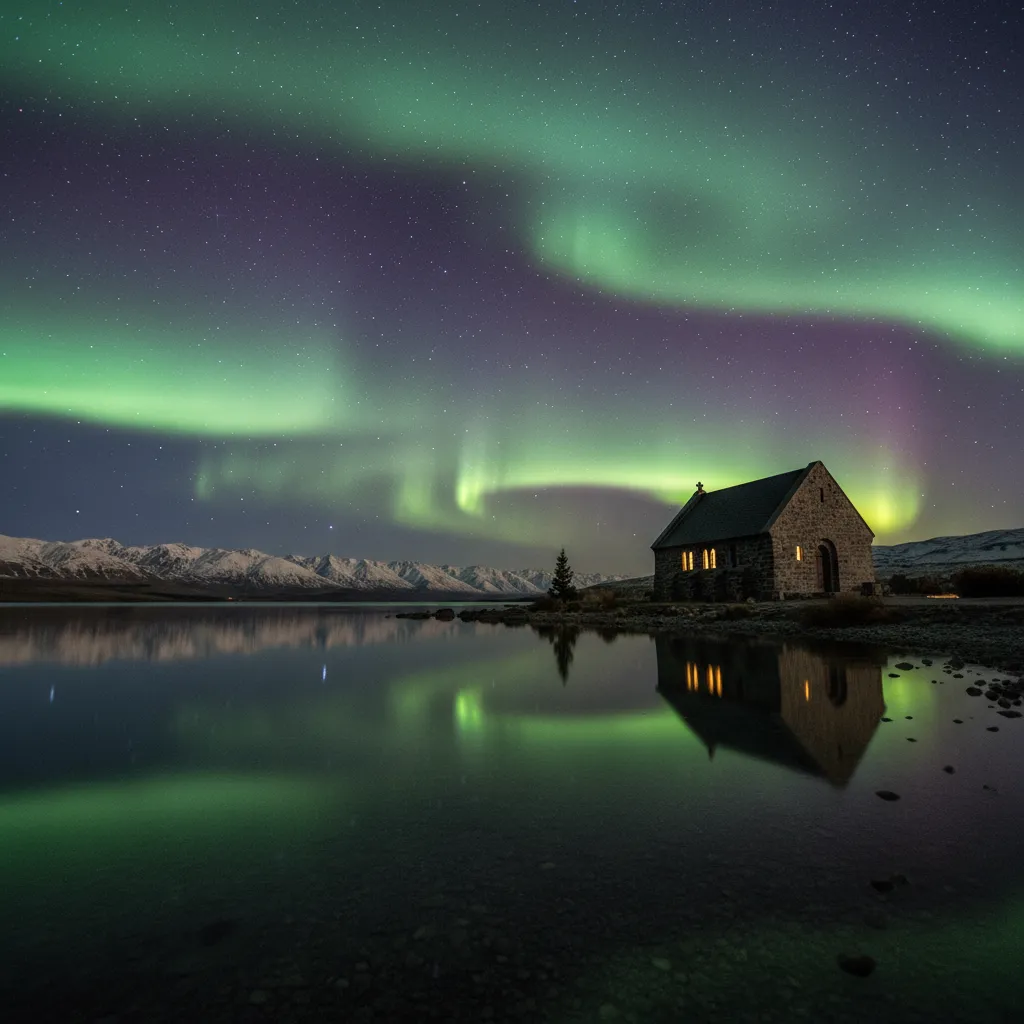
2. Aoraki Mackenzie International Dark Sky Reserve (Lake Tekapo)
This is the gold standard for New Zealand astro-tourism. The region is protected by strict lighting ordinances to prevent light pollution. The Church of the Good Shepherd is the most famous photo spot, but for a unique view, head up to the Mt. John Observatory. The elevation here helps get you above low-lying atmospheric haze, providing crystal clear views of the Milky Way and the Aurora.
3. Hoopers Inlet (Otago Peninsula)
Just outside of Dunedin, Hoopers Inlet is a favorite among local chasers. The shallow water allows for stunning reflections of the aurora beams (when the tide is right), and the surrounding hills block out the light pollution from Dunedin city to the north. It is accessible and offers a dramatic, wild landscape.
4. Stewart Island / Rakiura
“Rakiura” translates to “The Land of Glowing Skies.” As the southernmost populated island in New Zealand, it is physically closest to the auroral oval. If the forecast is marginal (Kp 3 or 4), Stewart Island is your best bet to see what the mainland misses.
Camera Settings for Capturing the Southern Lights
The human eye is not as sensitive to color in low light as a camera sensor. Often, what looks like a white or grey cloud to the naked eye will explode with greens and purples on your camera screen. Here is how to capture it.

Essential Gear
- Tripod: Non-negotiable. Exposures will be 10+ seconds.
- Lens: A wide-angle lens (14mm to 24mm) with a fast aperture (f/2.8 or lower) is ideal.
- Remote Shutter: To prevent camera shake when pressing the button (or use the 2-second timer).
Recommended Settings
Every situation differs, but these settings provide a solid baseline for starting:
- Focus: Manual Focus. Set your lens to infinity (∞). Use Live View to zoom in on a bright star and adjust the focus ring until the star is a sharp pinpoint.
- Aperture (f-stop): Open your lens as wide as possible (f/2.8, f/1.8, or f/1.4). This lets in the maximum amount of light.
- ISO: Start at ISO 1600. If the image is too dark, push to 3200 or 6400. Higher ISO introduces noise (grain), so find the balance for your specific camera body.
- Shutter Speed: Between 10 and 20 seconds. Do not exceed 25 seconds, or the rotation of the earth will cause the stars to trail, making the image look blurry.
- White Balance: Set to Kelvin (K) between 3500K and 4000K for a natural look. Auto White Balance often makes night skies too orange.
Apps and Resources for Real-Time Alerts
Predicting the aurora is difficult because solar wind conditions can change in minutes. Relying on a “3-day forecast” is often inaccurate. Real-time data is king.
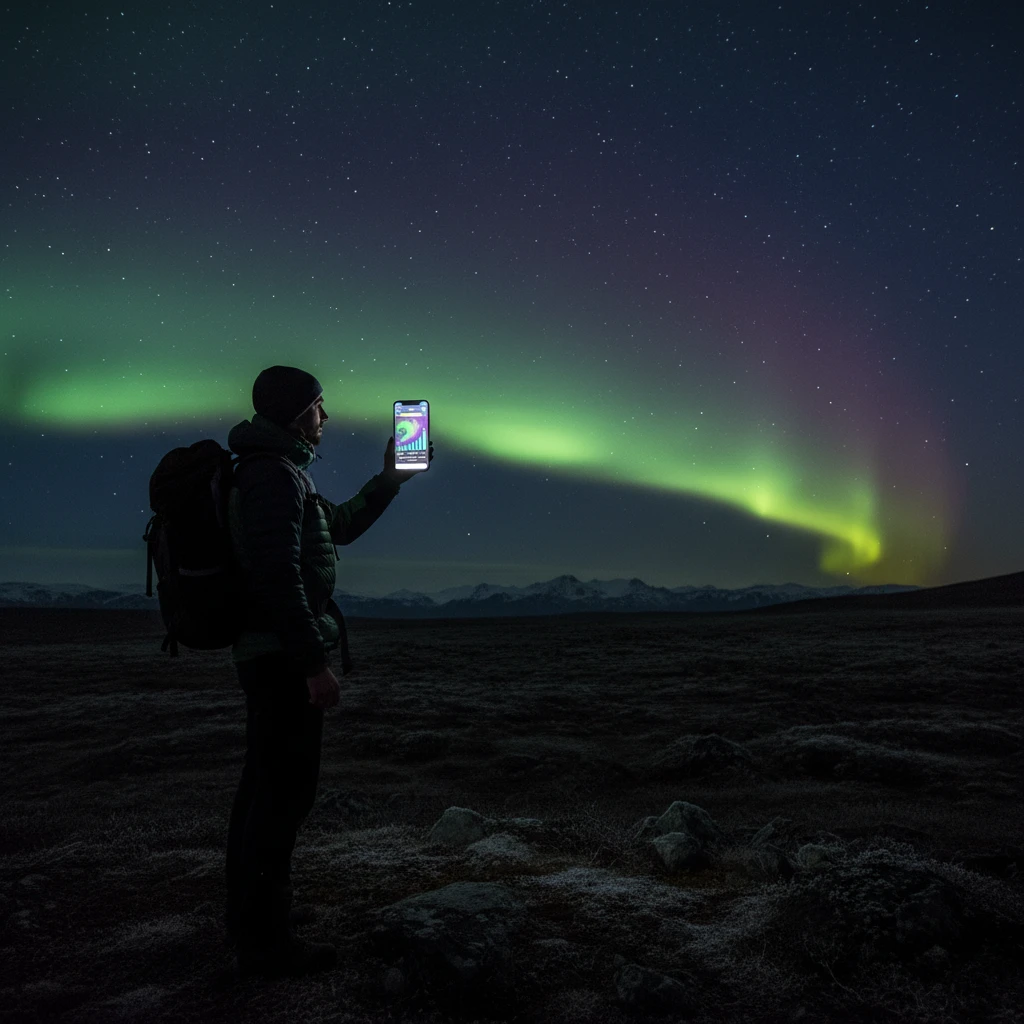
Top Apps and Websites
- Glendale App: This is arguably the most reliable resource for New Zealand aurora hunters. It aggregates data specifically for the NZ latitude and provides real-time graphs of the Bz and Density.
- Space Weather Live: An excellent app for tracking the global Kp index and solar flare activity in real-time.
- SWPC NOAA: The Space Weather Prediction Center provides the raw data that most apps use. Checking their “30-minute forecast” is highly recommended.
- Facebook Groups: Groups like “Aurora Australis (NZ)” are invaluable. When the alerts go off, locals post “eyes on” reports immediately. If someone in Invercargill posts a photo of a beam, it’s time to head out.
Interpreting the Data in Real-Time
When looking at these apps, look for this “Holy Trinity” of data points:
- Bt (Total Strength): Needs to be high (10nT or higher).
- Bz (Direction): Needs to be negative (South).
- Density: Needs to be high (10 p/cm3 or higher).
If the Bt is high and the Bz drops sharply south, a substorm is likely imminent.
Frequently Asked Questions
What is the best month to see the Aurora Australis in New Zealand?
The best months are during the winter season, specifically June, July, and August. These months provide the longest hours of darkness, maximizing your chances of spotting the lights. The equinox months of March and September also see statistically higher solar activity due to the Russell-McPherron effect.
Can you see the Southern Lights from Queenstown?
Yes, you can see the Southern Lights from Queenstown, provided the solar storm is strong enough (usually Kp 5+). However, light pollution from the town center can hinder visibility. It is best to drive out to locations like Moke Lake or the Crown Range for a clearer view.
What Kp index is needed for Aurora in New Zealand?
A Kp index of 4 may show faint photographic aurora on the southern horizon. A Kp index of 5 (G1 Storm) is generally required for naked-eye visibility in the lower South Island. Kp 7 or higher is needed to see the aurora in the North Island.
Is the Aurora Australis visible to the naked eye?
Yes, but it often looks different than it does in photos. To the naked eye, a weak aurora often appears as a shifting white or grey glow, similar to a cloud. During strong storms (Kp 6+), the eye can distinguish colors, usually beams of green and pillars of red or pink dancing across the sky.
Do I need a tour guide to see the Southern Lights?
You do not strictly need a tour guide, as the locations are accessible. However, booking a tour with an expert astrophotographer or dark sky guide can significantly increase your chances. They know the micro-climates, the best vantage points, and can assist with camera settings.
Why are my aurora photos not sharp?
Blurry aurora photos are usually caused by three things: the camera moved during the long exposure (use a tripod), the shutter speed was too long causing star trails (keep it under 20 seconds), or the focus was not set correctly to infinity. Always double-check focus using Live View on a bright star.